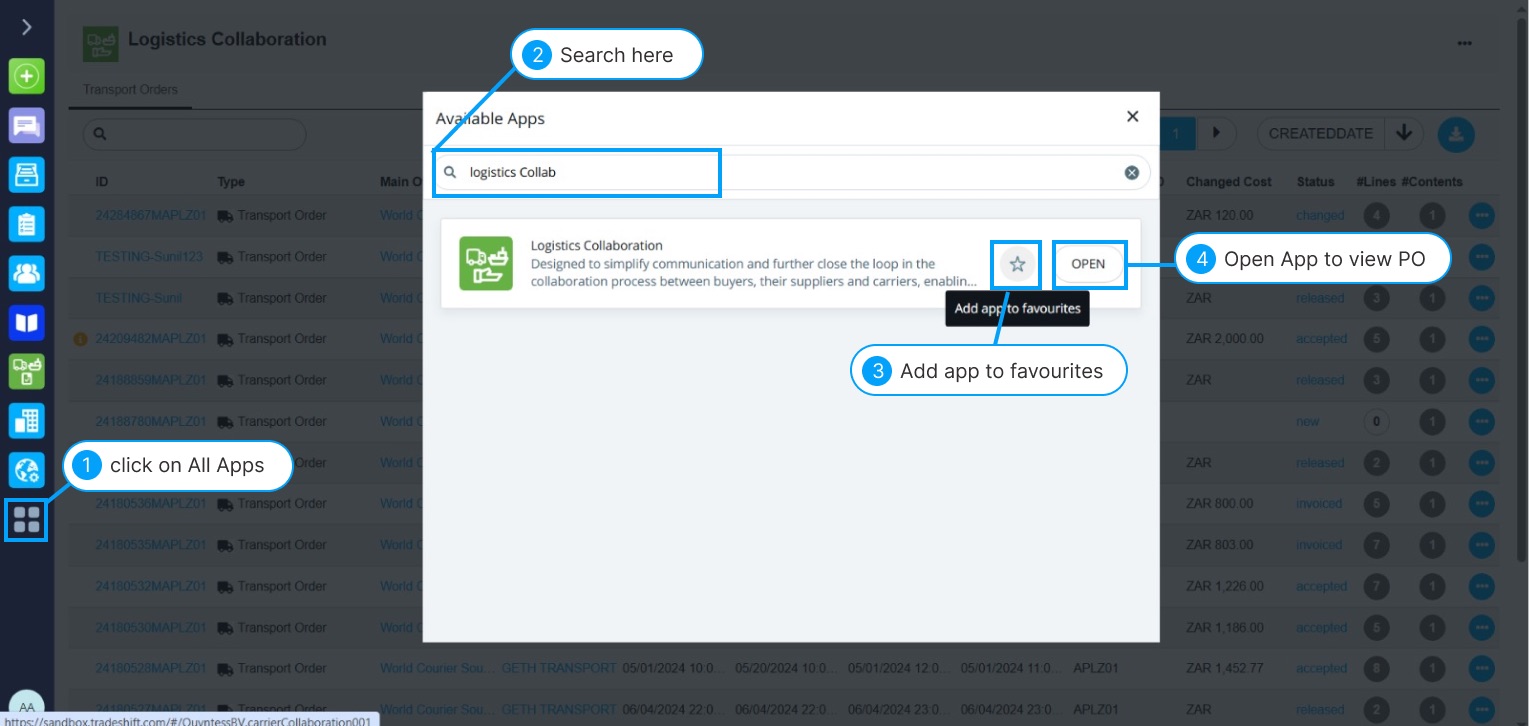
Follow these steps to access the Purchase Order:
1. Go to All Apps from the menu
2. Search for Logistics Collaboration App
3. Click the ⭐ icon to add it to your favorites for quick access
4. Open the app to view all available Purchase Orders
5. Search for the purchase order you wish to invoice against.
- Tip: Enter the PO number in the search bar to locate it quickly
- Note: If the PO isn’t available, contact World Courier representative so they can upload it
6. The PO status will appear as " Released "
 Note: If actual pickup/delivery dates aren’t visible, it means they haven’t been updated by World Courier yet. These will appear in Tradeshift once confirmed.
Flip a Purchase Order Into an Invoice
After opening a PO, you can review all key details such as the transport order ID, estimated & actual pickup and delivery times, order status and much more.
Once you've reviewed the charges, you must submit the PO for it to be flipped into an invoice. There are two invoicing scenarios:
Case 1: Submitting a PO Without Additional Charges
If everything aligns with your agreed Rate Card, follow these steps:
1. Click Submit
2. Status updates to "confirmed"
3. The Invoice button will appear instantly
4. Click on " Invoice " button to flip the Purchase Order into invoice
5. A pop-up will appear — click the ![]() add icon to begin the invoice draft.
add icon to begin the invoice draft.
6. Click Yes when prompted to generate a draft
7. Click the ![]() view icon to preview the invoice
view icon to preview the invoice
- All PO lines will be copied over to the invoice
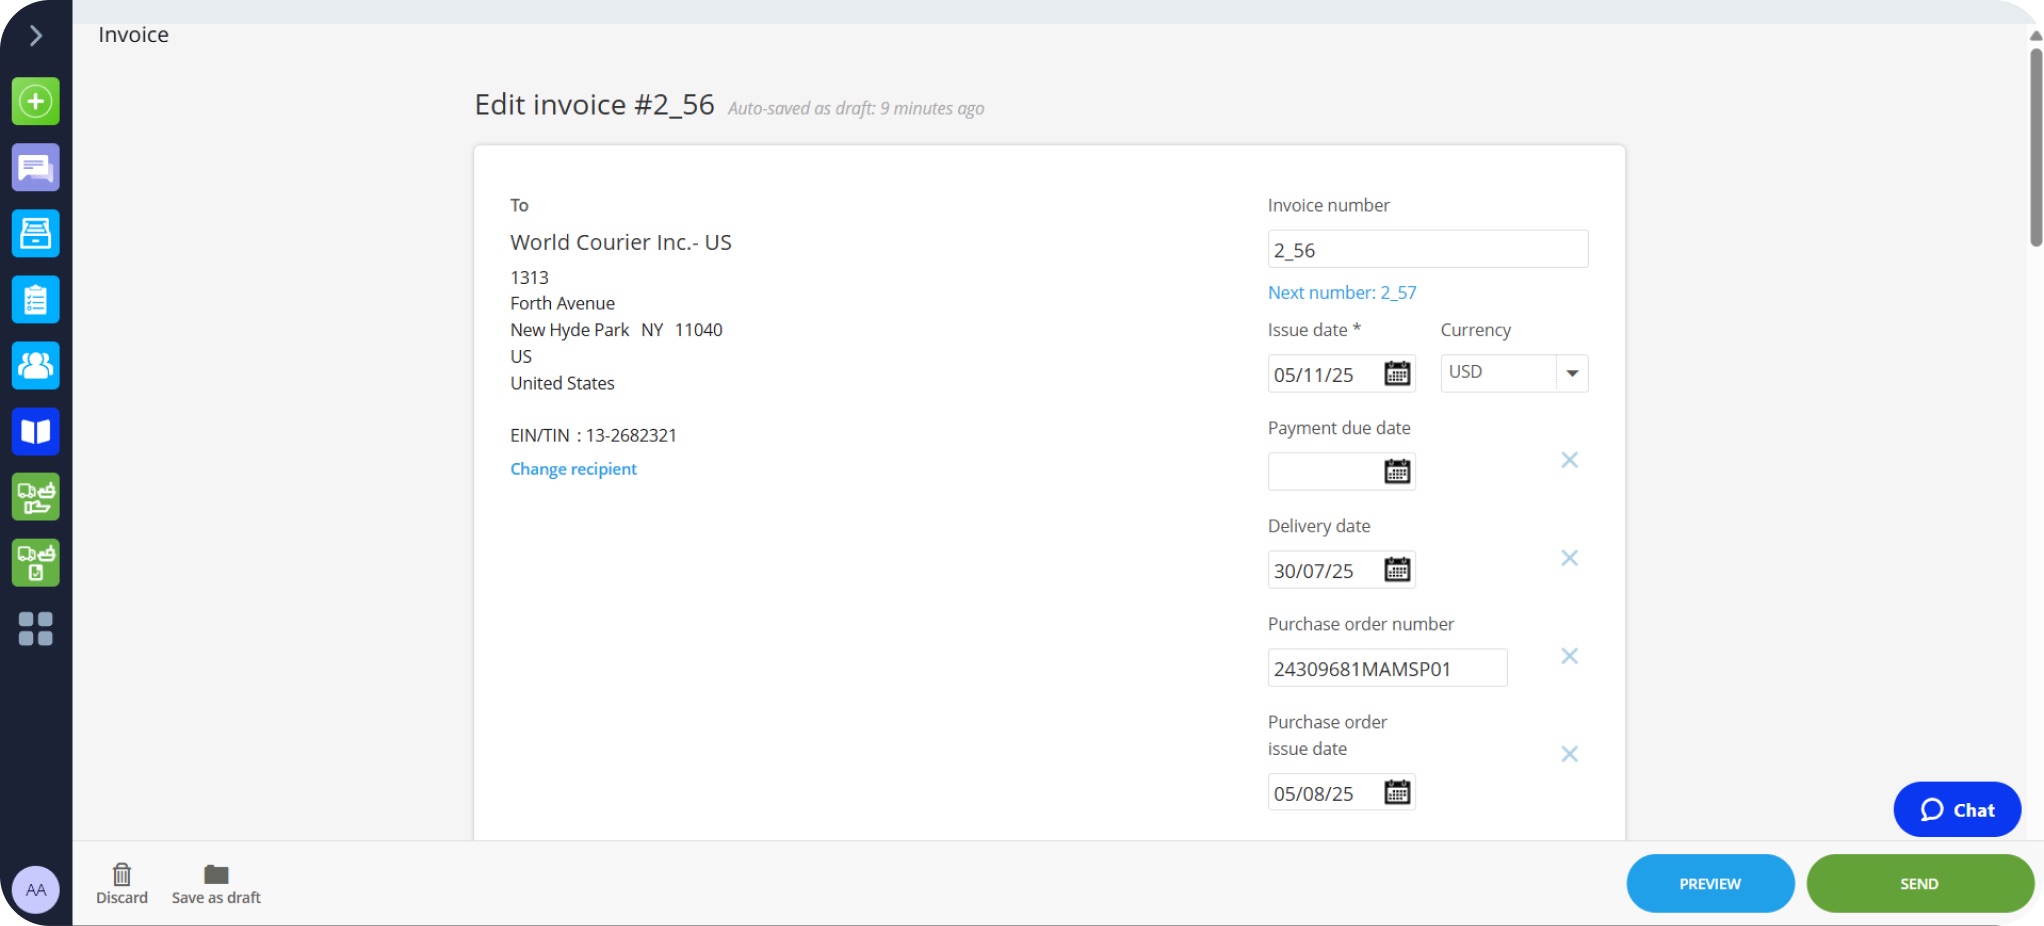
8. Review the invoice lines, enter your invoice number,payment terms, payment due date (as agreed with World Courier) . Add any other details, if required.
9. Click Send to submit the invoice to World Courier.
Note: If no charges are added and you click "Submit", Tradeshift considers the PO auto-approved.
Case 2: Submitting a PO With Additional Charges
If you need to add extra costs (e.g., dry ice, parking), follow these steps:
1. Once all charges are added, click Submit
- The PO status updates to " Changed "
- It goes to World Courier for review
2. After review:
- If approved → status changes to " Accepted ", and the Invoice button appears
- If rejected → status changes to " Rejected ", and you must resubmit with updated details or a clearer explanation
3. Once the Invoice button appears
4. Click on " Invoice " button to flip the Purchase Order into invoice
5. A pop-up will appear — click the ![]() add icon to begin the invoice draft.
add icon to begin the invoice draft.
6. Click Yes when prompted to generate a draft
7. Click the ![]() view icon to preview the invoice
view icon to preview the invoice
- All PO lines will be copied over to the invoice
8. Review the invoice lines, enter your invoice number, payment terms, payment due date (as agreed with World Courier) . Add any other details, if required.
9. Click Send to submit the invoice to World Courier.
![]() Important: Only charges approved on the PO level can be included in the invoice. You cannot add new charges during invoicing.
Important: Only charges approved on the PO level can be included in the invoice. You cannot add new charges during invoicing.
![]() Need help? Contact your World Courier representative to understand rejection reasons.
Need help? Contact your World Courier representative to understand rejection reasons.
FLIP MULTIPLE PURCHASE ORDERS INTO AN INVOICE
You can also flip multiple POs into an invoice directly from the Tradeshift platform.
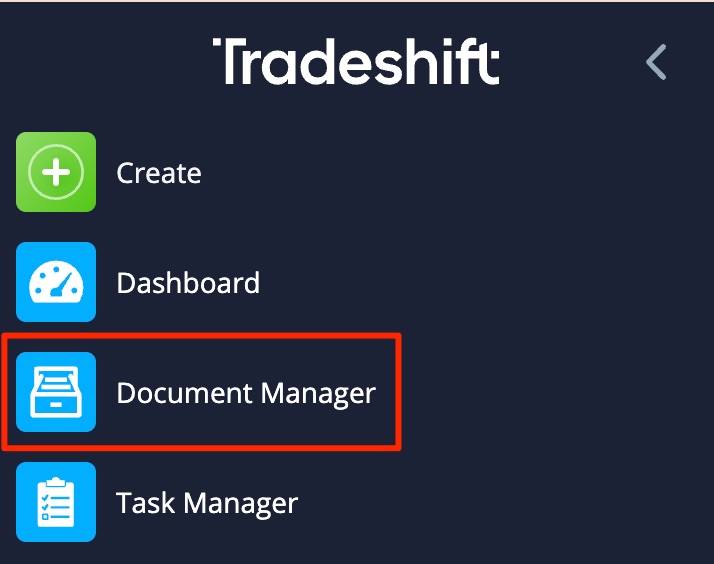
1. Go to Document Manager from the main menu.
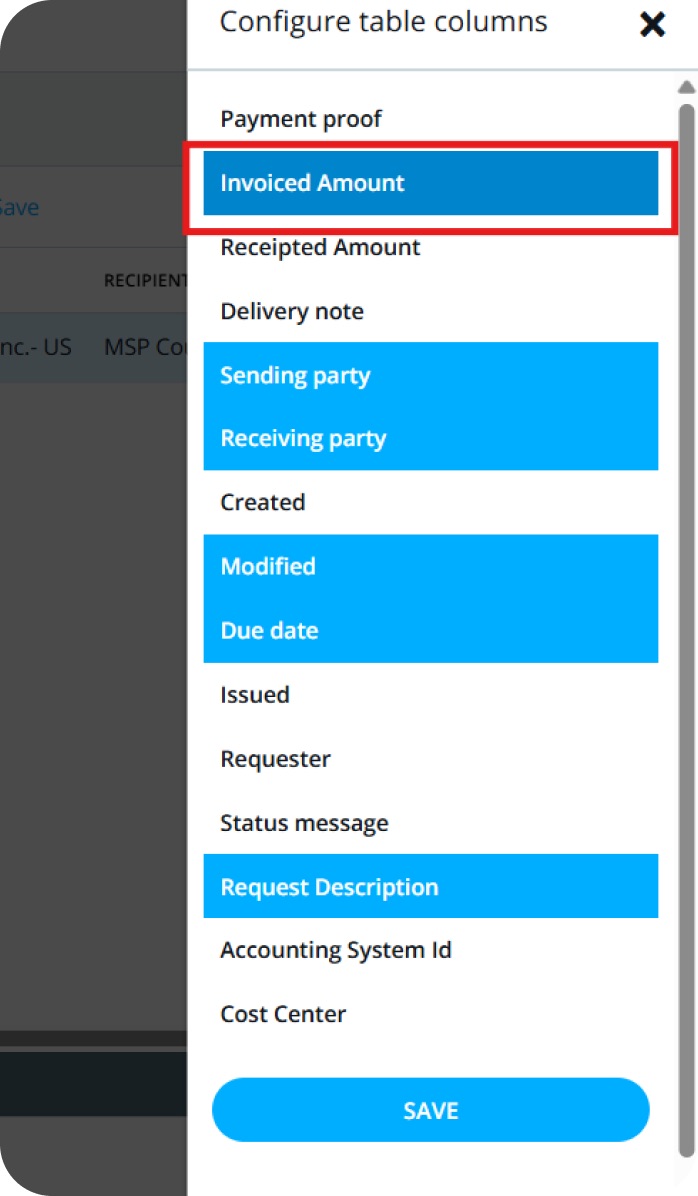
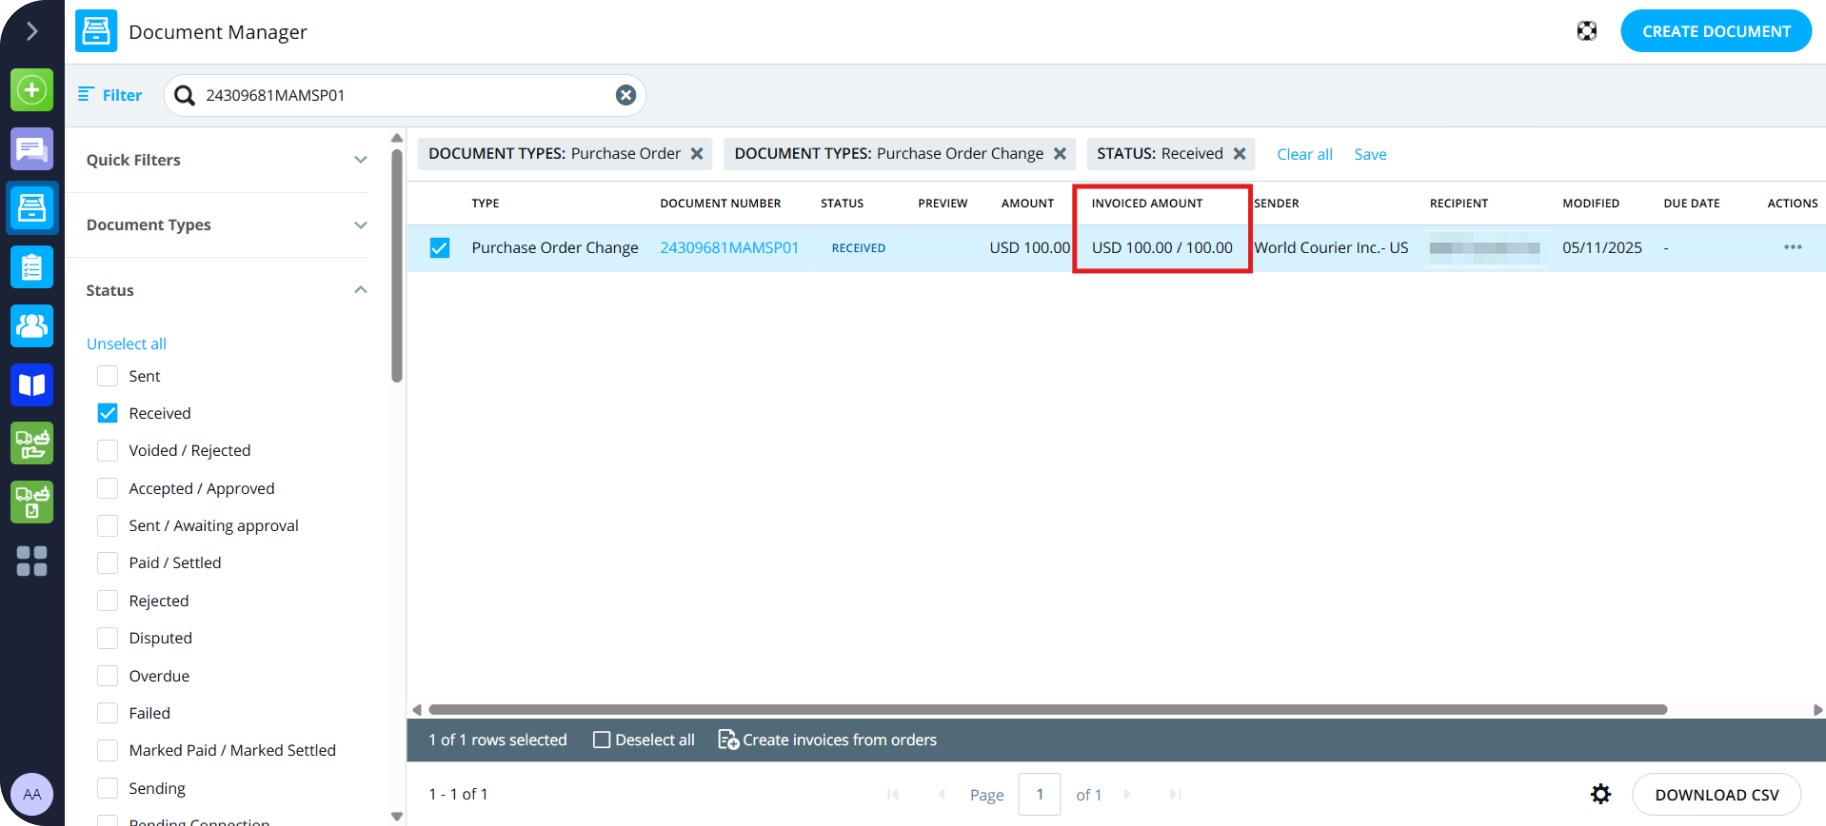
2. Click on the Settings icon to add the invoiced amount column.
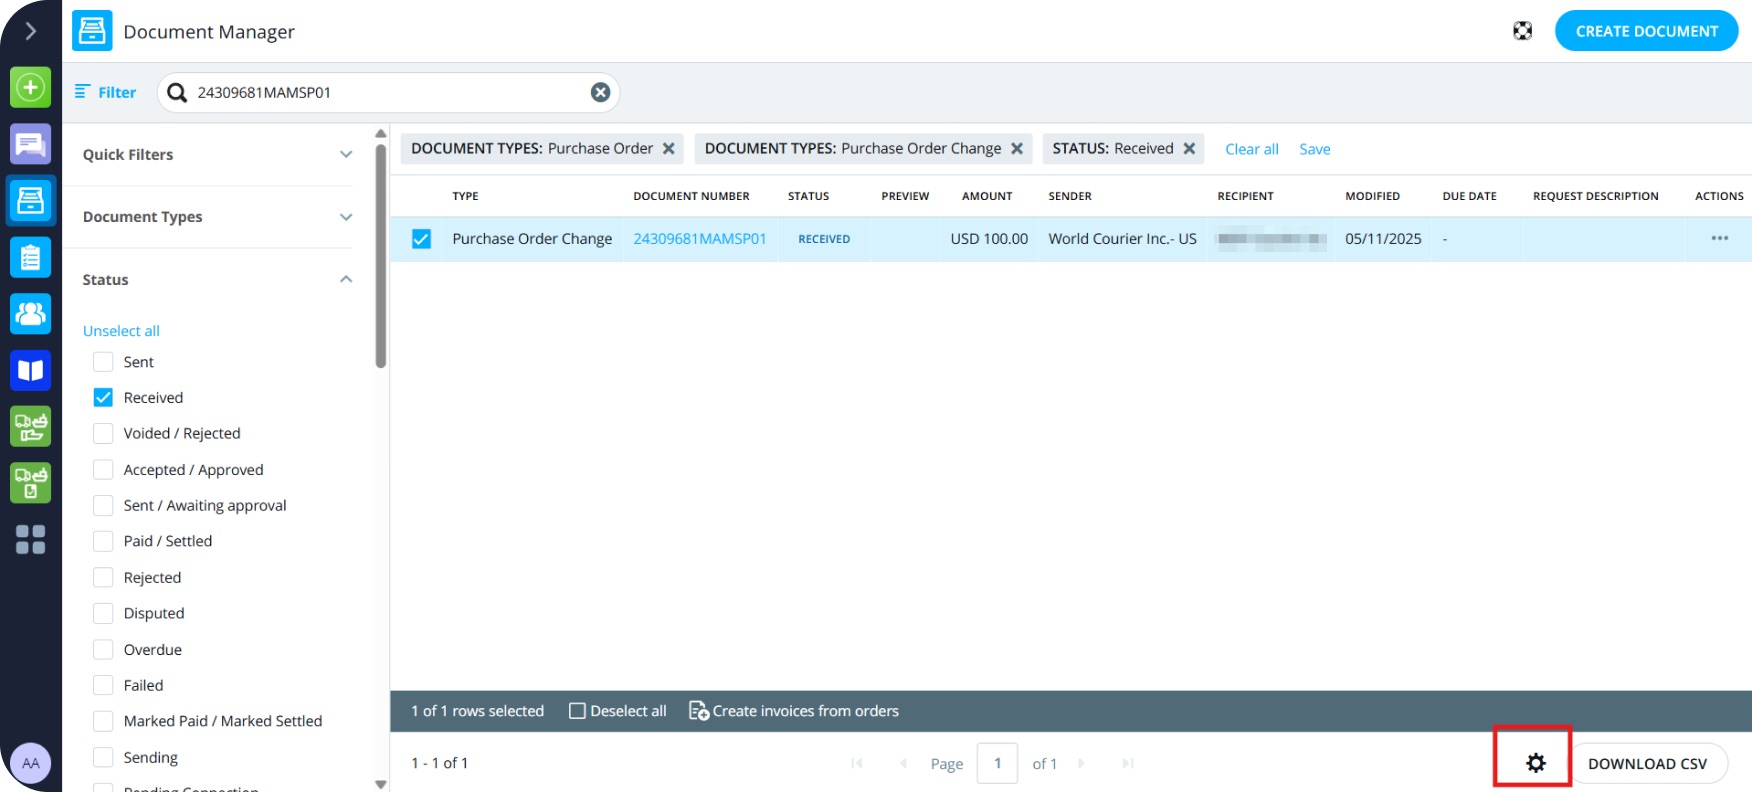
3. Click on the invoiced amount then click save.
4. "Invoiced amount" column will appear in the list. If your PO is fully invoiced, it will show as e.g. 100/100. If it is not invoiced, it will show as 0/100.
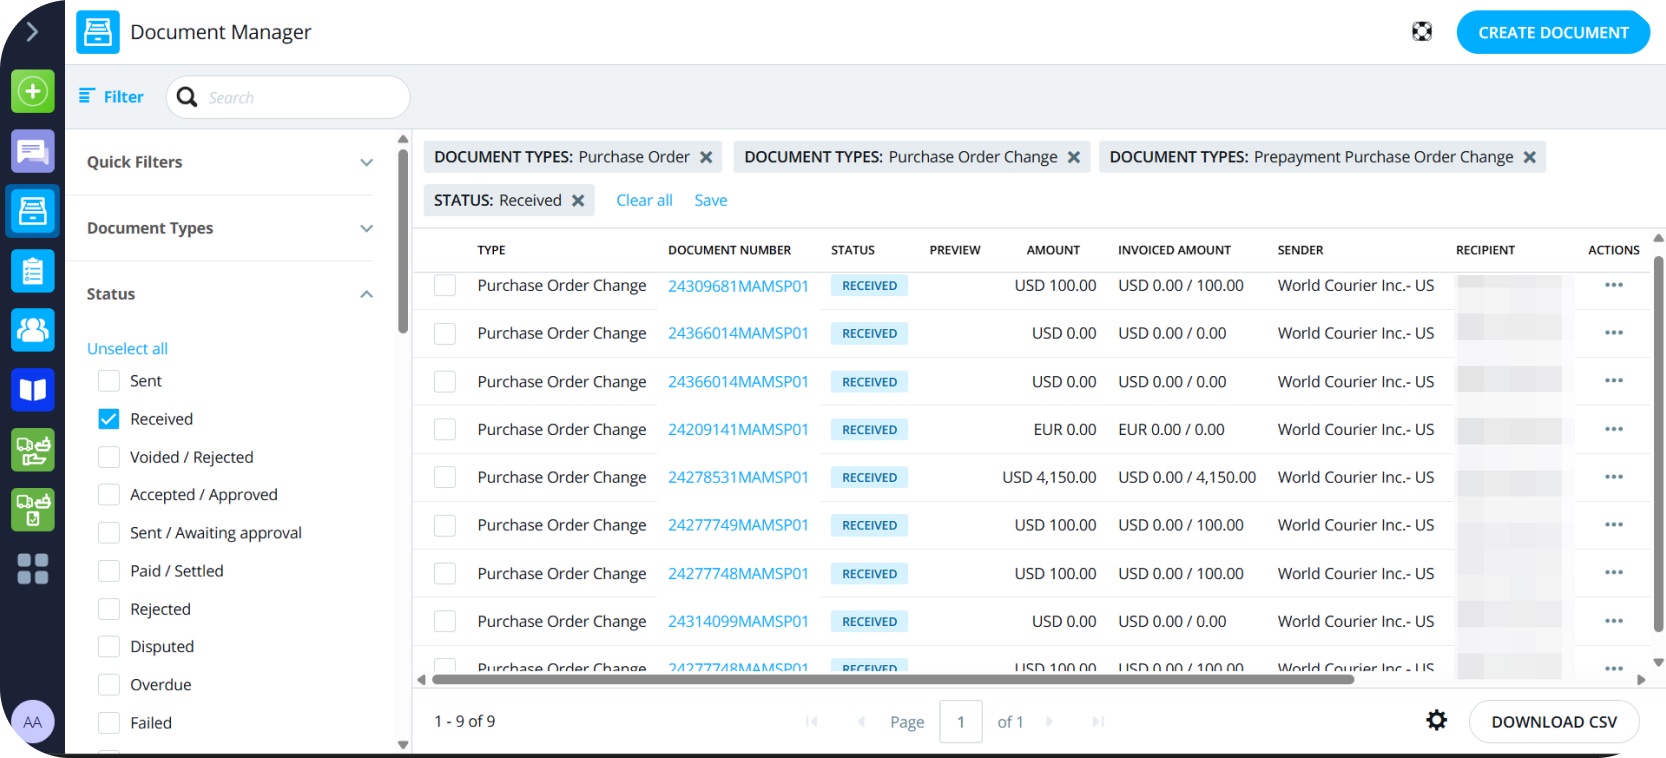
5. All POs available for invoicing will be listed on screen.
6. Select the Purchase Orders you want to invoice by ticking the checkboxes.
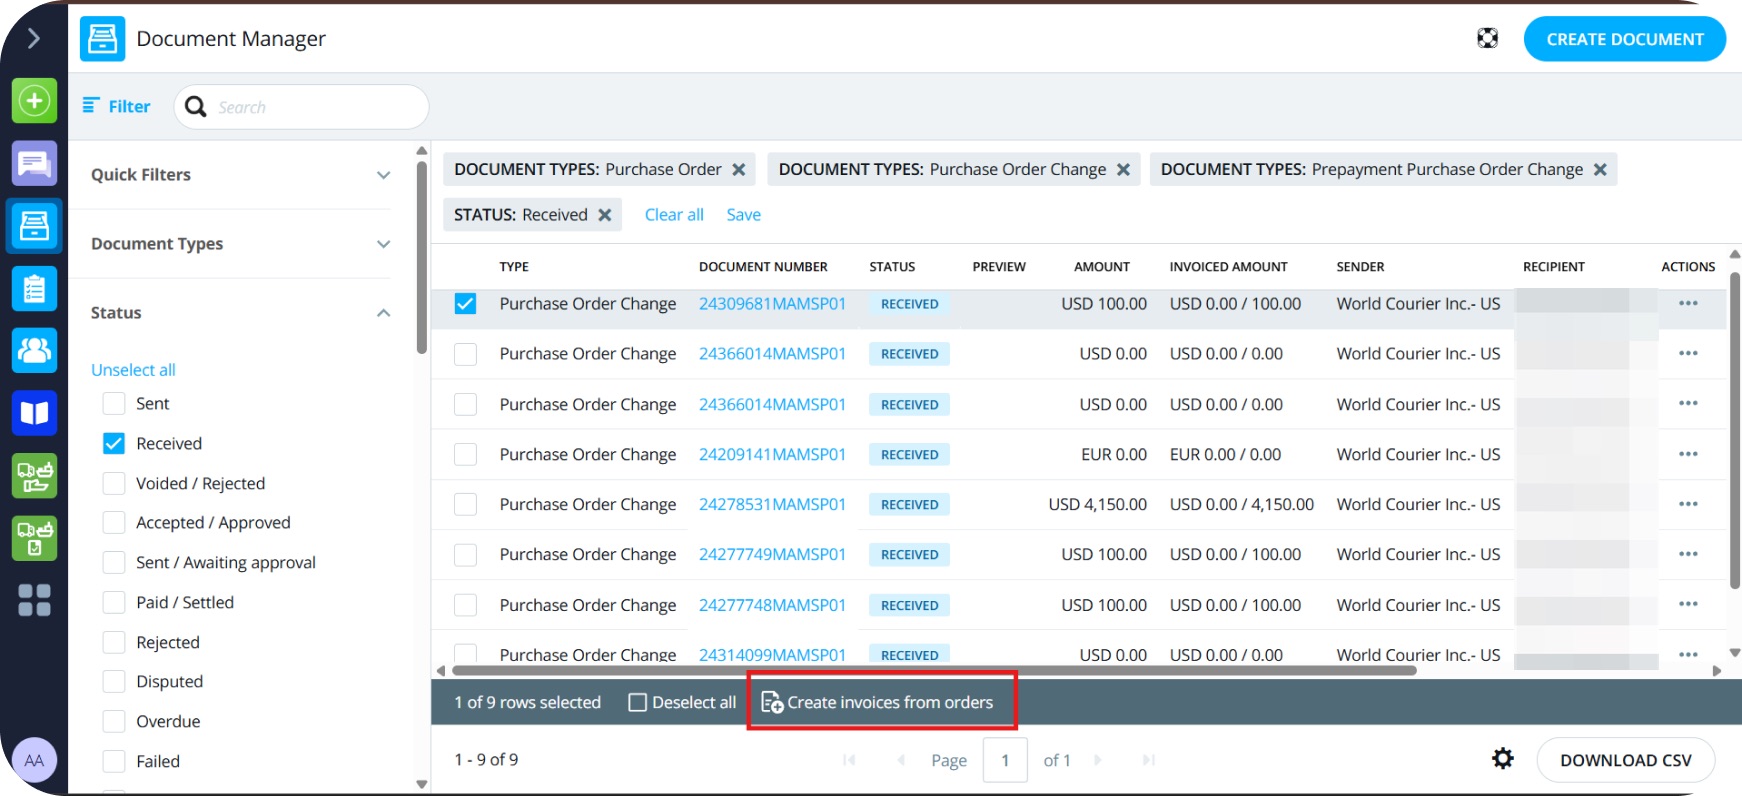
7. Click on Create invoices from orders at the bottom of the screen.
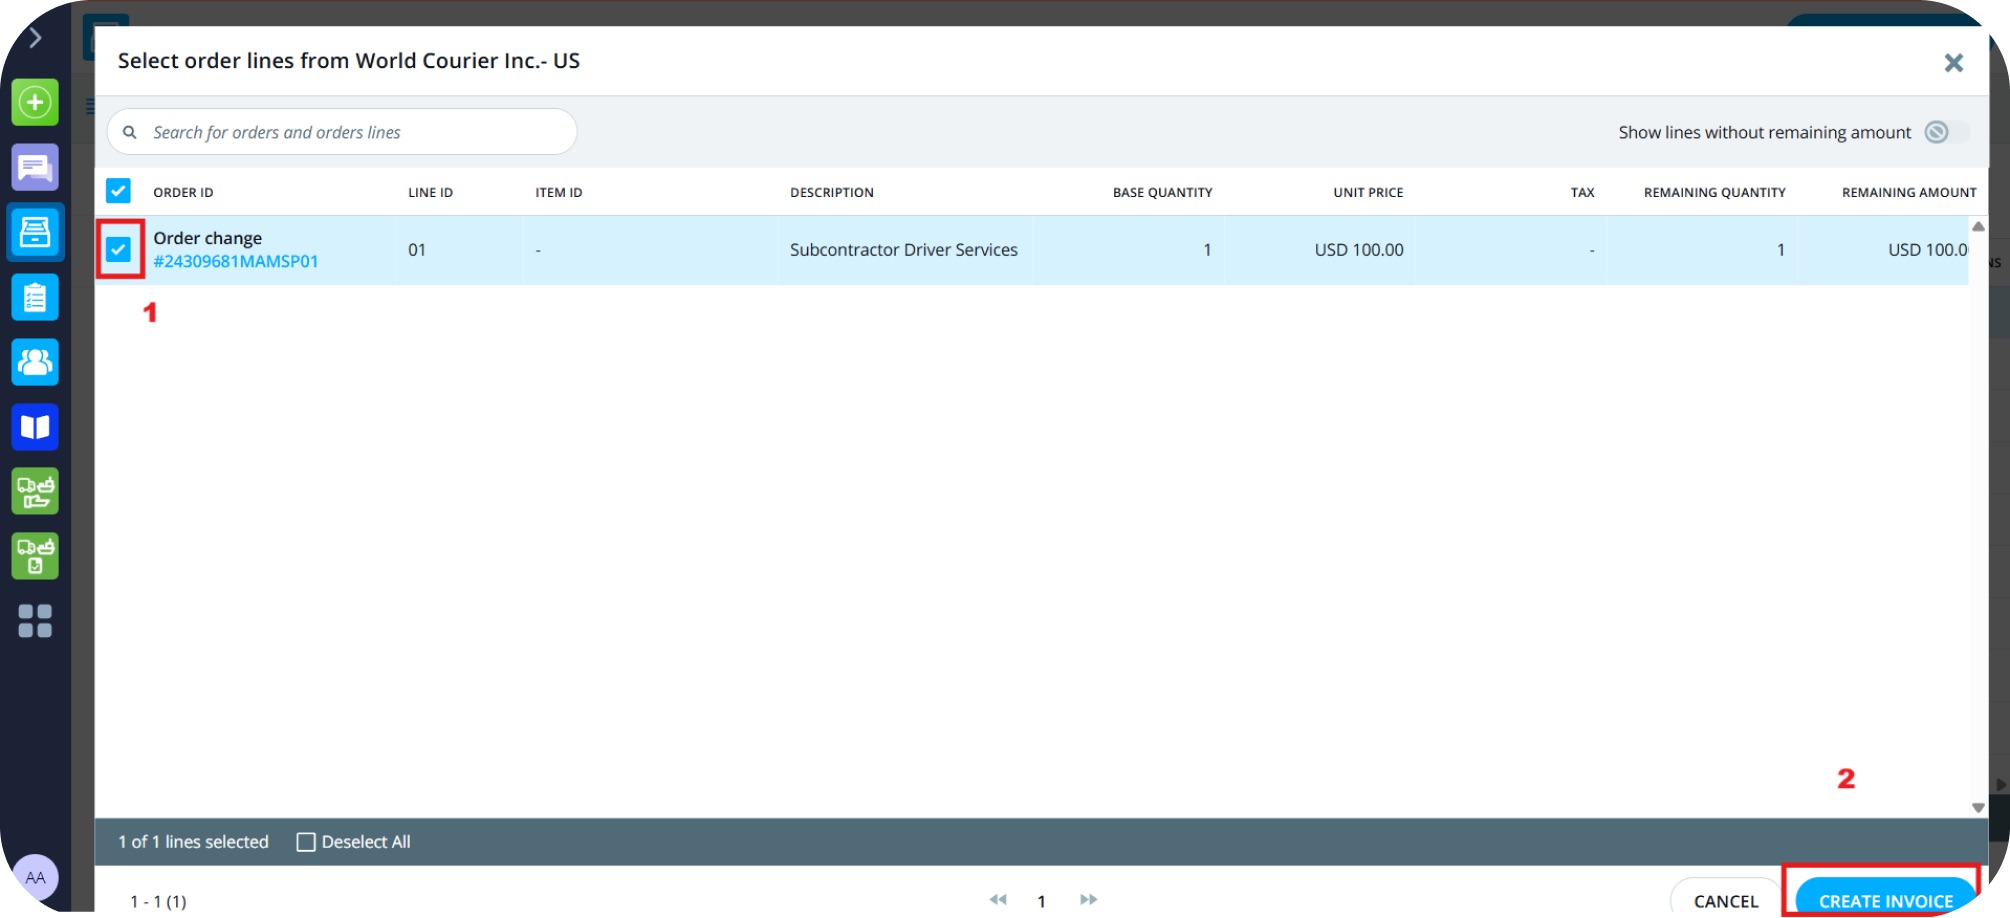
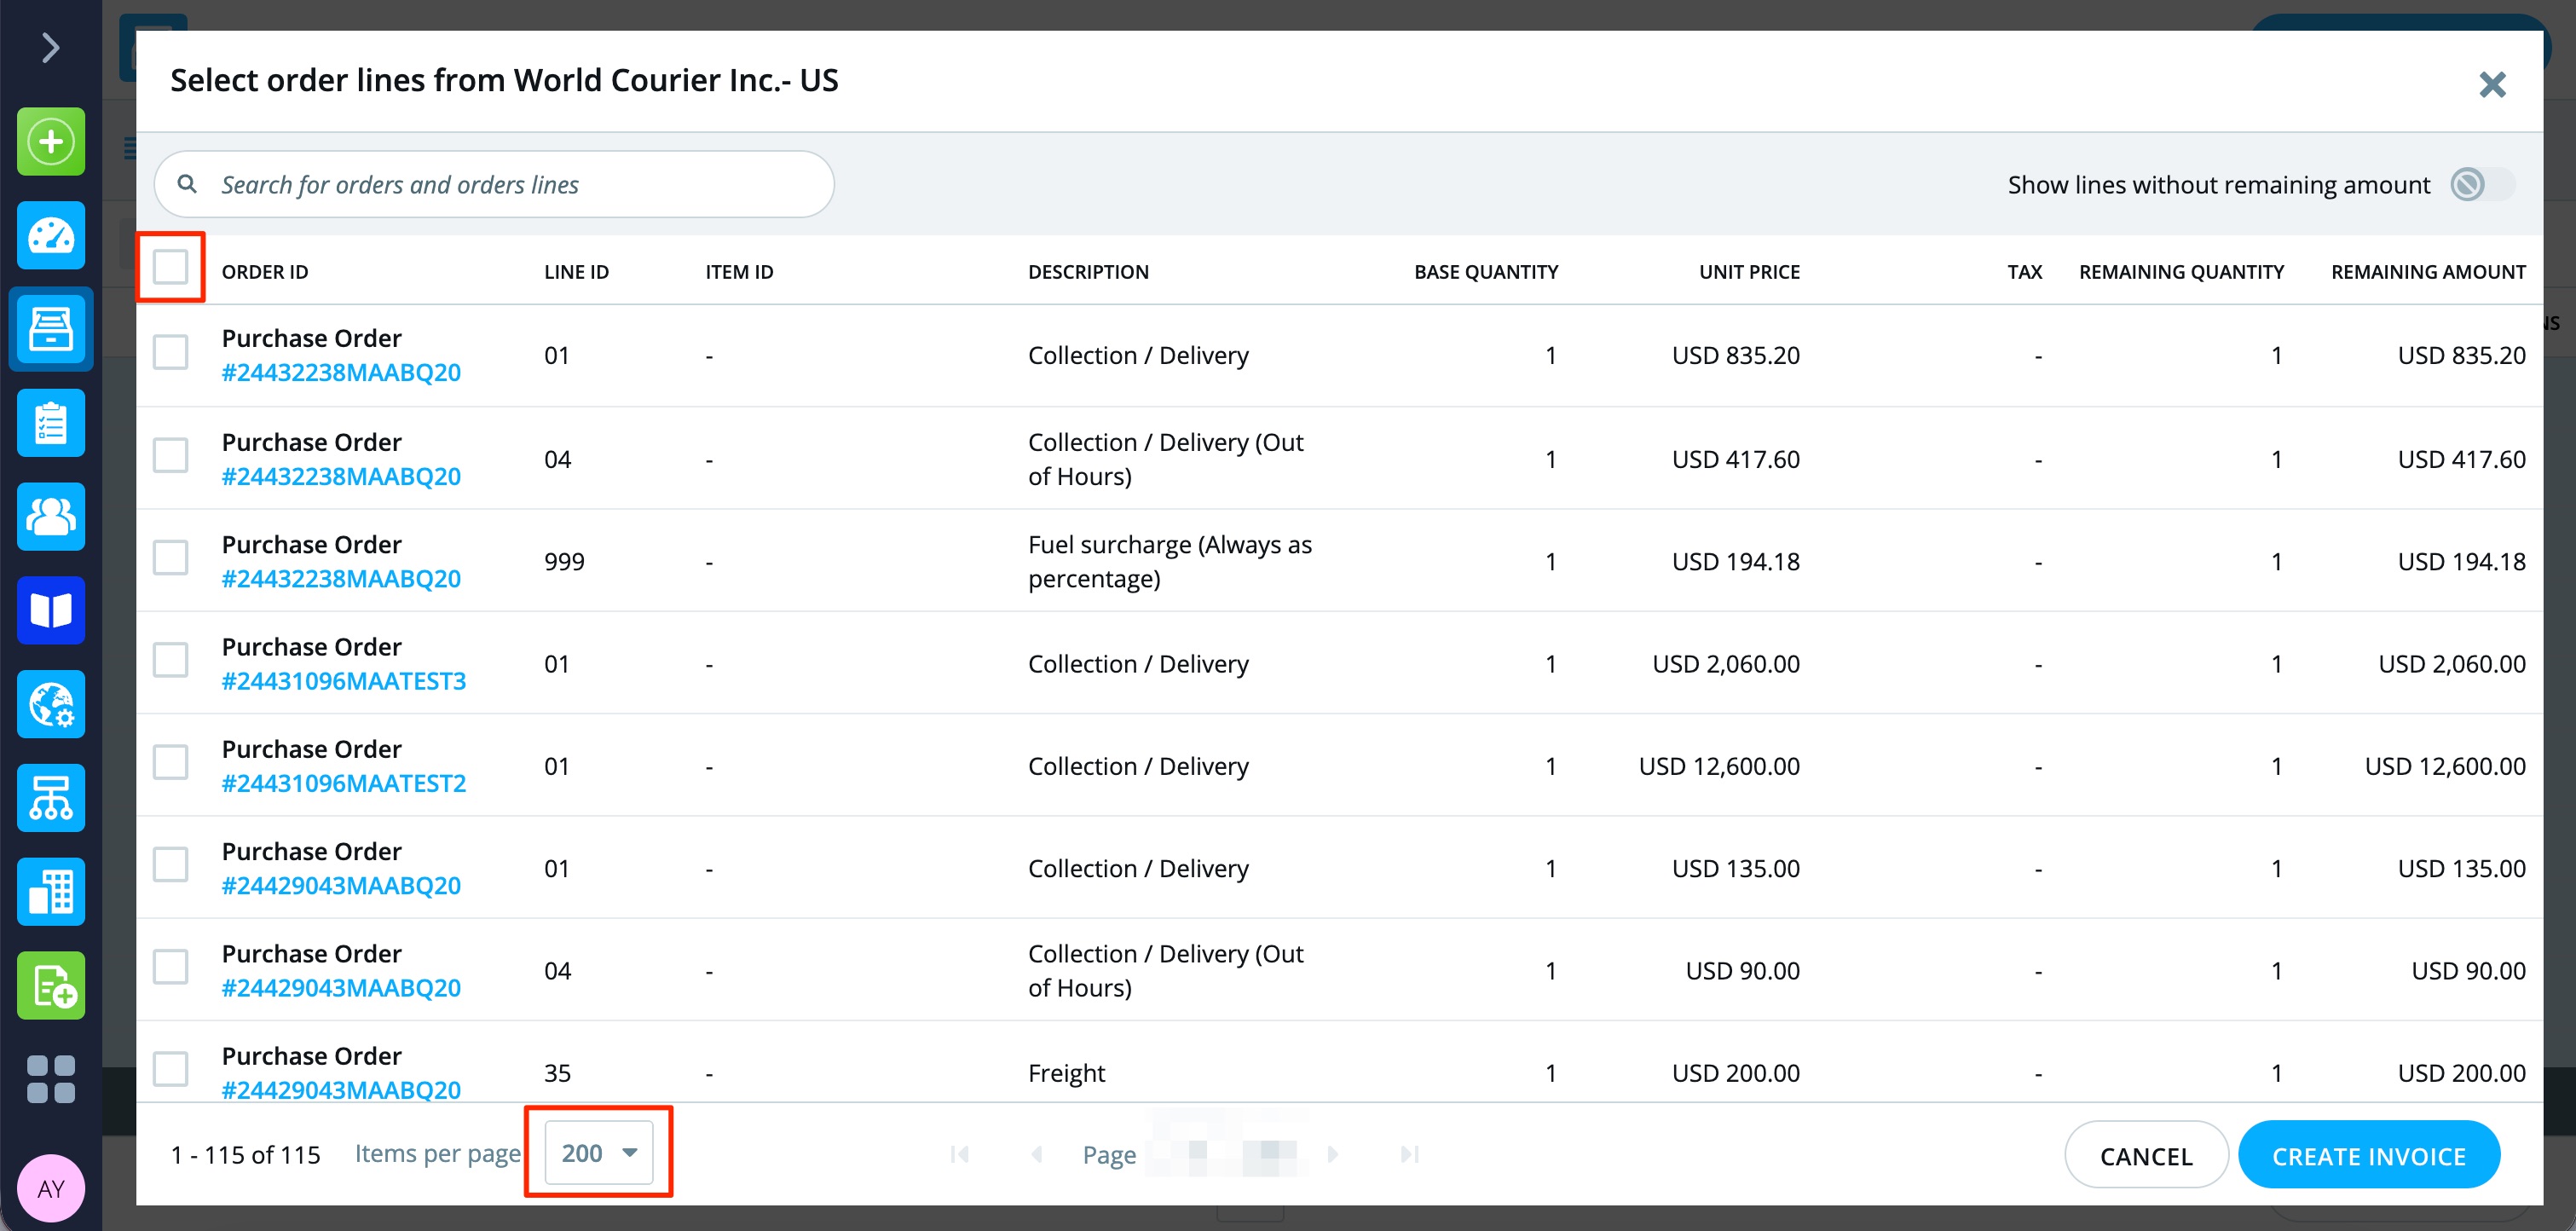
8. Tick the checkbox then click on Create Invoice (partial invoicing is allowed).
9. Please note: you can select "Order ID" to select all lines from a page, and you must do that on every page .To make it easier, you can select to see more lines per page here:
10. Review the invoice lines, enter your invoice number, payment terms, payment due date. Add any other details, if required.
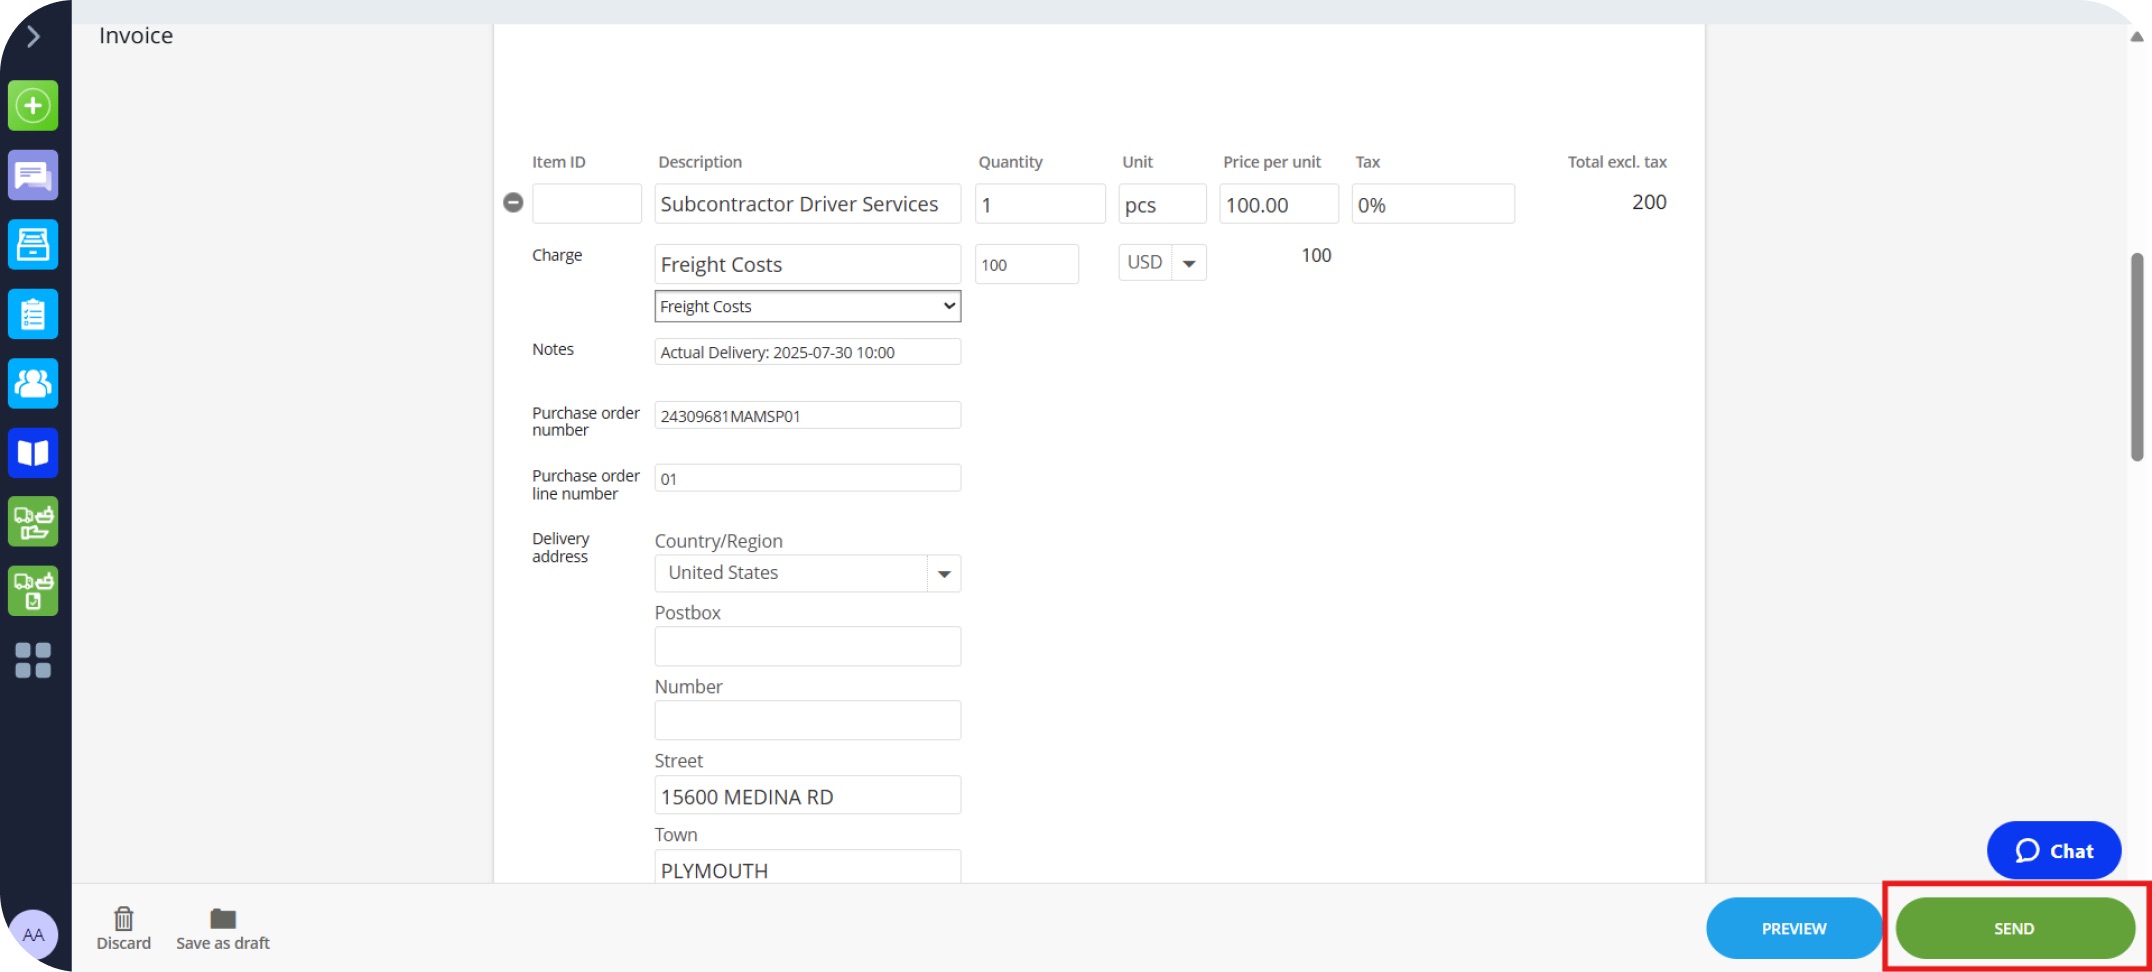
11. Once complete, click Send to submit the invoice to World Courier.

VIDEO GUIDE
Frequently ASKED Questions (FAQ'S)
What happens if I don't provide the correct information on an invoice?
Once you submit an invoice to us, we will check the invoice before processing payment. If there is anything missing, we will reject the invoice and let you know what's missing.
Do I need to add payment information to the invoice?
World Courier require all the suppliers to reflect their payment terms and methods on each invoice.
How do I invoice different branches/entities?
You should be connected to the branches that you do business with. When you are creating your invoice, you will be able to select the branch/entity that you would like to invoice. If you have just started doing business with a new entity you should receive a connection request soon or you can send a connection request through the Network App. As the e-invoicing roll out project progresses you will be invited to connect with other entities.
What should I do if I don't have all the information I need?
The information being requested is what is required in order to process your invoices. If you have any concerns, you can contact us. Our contact details are included in the Need Help section on main page.
What information do I need to provide on my invoice?
The details you must provide are: your invoice number, payment terms, payment due date. Additional details may be required depending on your country. You can check what validation rules your customer has in the "What are the validation rules?".
What are the validation rules?
Validation rules have been set up by World Courier to reduce the number of queries relating to invoices which can delay payments. These rules ensure that all necessary information is included on your invoices. View details here.
Is it mandatory to use Tradeshift for invoicing World Courier?
Yes, going forward World Courier is moving towards a full electronic procurement process in order to streamline our operations. We will be transitioning to Tradeshift as our preferred platform for agent invoicing.
This will be beneficial to you as our valued agent, as it is aimed at improving the invoicing experience for both you and World Courier, ensuring smoother transactions moving forward.
What should I do if I need to recall or correct an invoice I already submitted?
You will need to issue a credit note and a new invoice.